I've slowly been getting back in the studio and pottery action after a very busy summer. I have some things to share and shows and classes coming up, but tonight I thought I would share a recipe. This is our second year having a
CSA Share with
Early Morning Farm. We really like the selection, and I also think it is a great price! They have a lot of options for CSA Members, I definitely recommend checking it out if you are in the CNY area. Pick up is Thursday so every Wednesday night I throw something together with whatever veggies are still floating around the fridge. Tonight it was eggplant, bok choy, mizuna, carrots, and a yellow pepper. I added in a yellow squash grown by the children at my son's school and rice noodles to make a lovely meal of
Grilled Eggplant with Asian Stir-fry and Peanut Noodles. You can scroll right through if you want to get directly to the recipe. This took about an hour with many breaks and interruptions from a tiny human (2.5 year old boy) and serves 4-6 depending on your appetite!
A word about eggplant, most recipes call for salting it to remove the bitterness and or water. This step is called sweating. I can confirm this is definitely necessary! One Easter I threw out a whole batch after skipping this step-it practically burned my tongue. With the very fresh eggplants we get in our CSA this might not be completely necessary, but I still never skip this step. Whenever using eggplant in a recipe I cut it in large thick slabs and then salt both sides.
I let this sit while I prep everything else for the meal.
When you can see water on the surface rinse the eggplant and pat-dry. Rinsing it will make sure that it does not turn out too salty. I took a short break to play in the yard with my son while it was sweating, so you could really see the water on the surface when I got back into the kitchen.
We gave this eggplant a quick grill on both sides to finish it off, so I first marinated it with sesame oil, tamari (soy sauce), and water. Eggplant acts like a sponge so I always thin marinades for eggplant with water. It never compromises the flavor. Here I used equal parts of the sesame oil, tamari, and water to end up with about 1/4 cup marinade, but you can adjust to your taste buds.
I had a lot of greens to clean which is sometimes a chore on a week night. I try to plan ahead sometimes by rinsing and washing in advance. Tonight was not one of those nights! I chopped all the greens in to bite size pieces and then washed them using a salad spinner. Place the strainer filled with greens in the salad spinner bowl. Fill with water, swish a lot, and lift out the strainer. Dump and repeat three times or so. Tonight I did just one, sometimes I do more. Most recipes and guidelines suggest to wash and then chop greens and vegetables so you don't expose the pieces to extra dirt, etc. Since I am not afraid of dirt and trust the source of my veggies I always cut and then rinse greens, I find this much easier. You can do whichever you prefer.
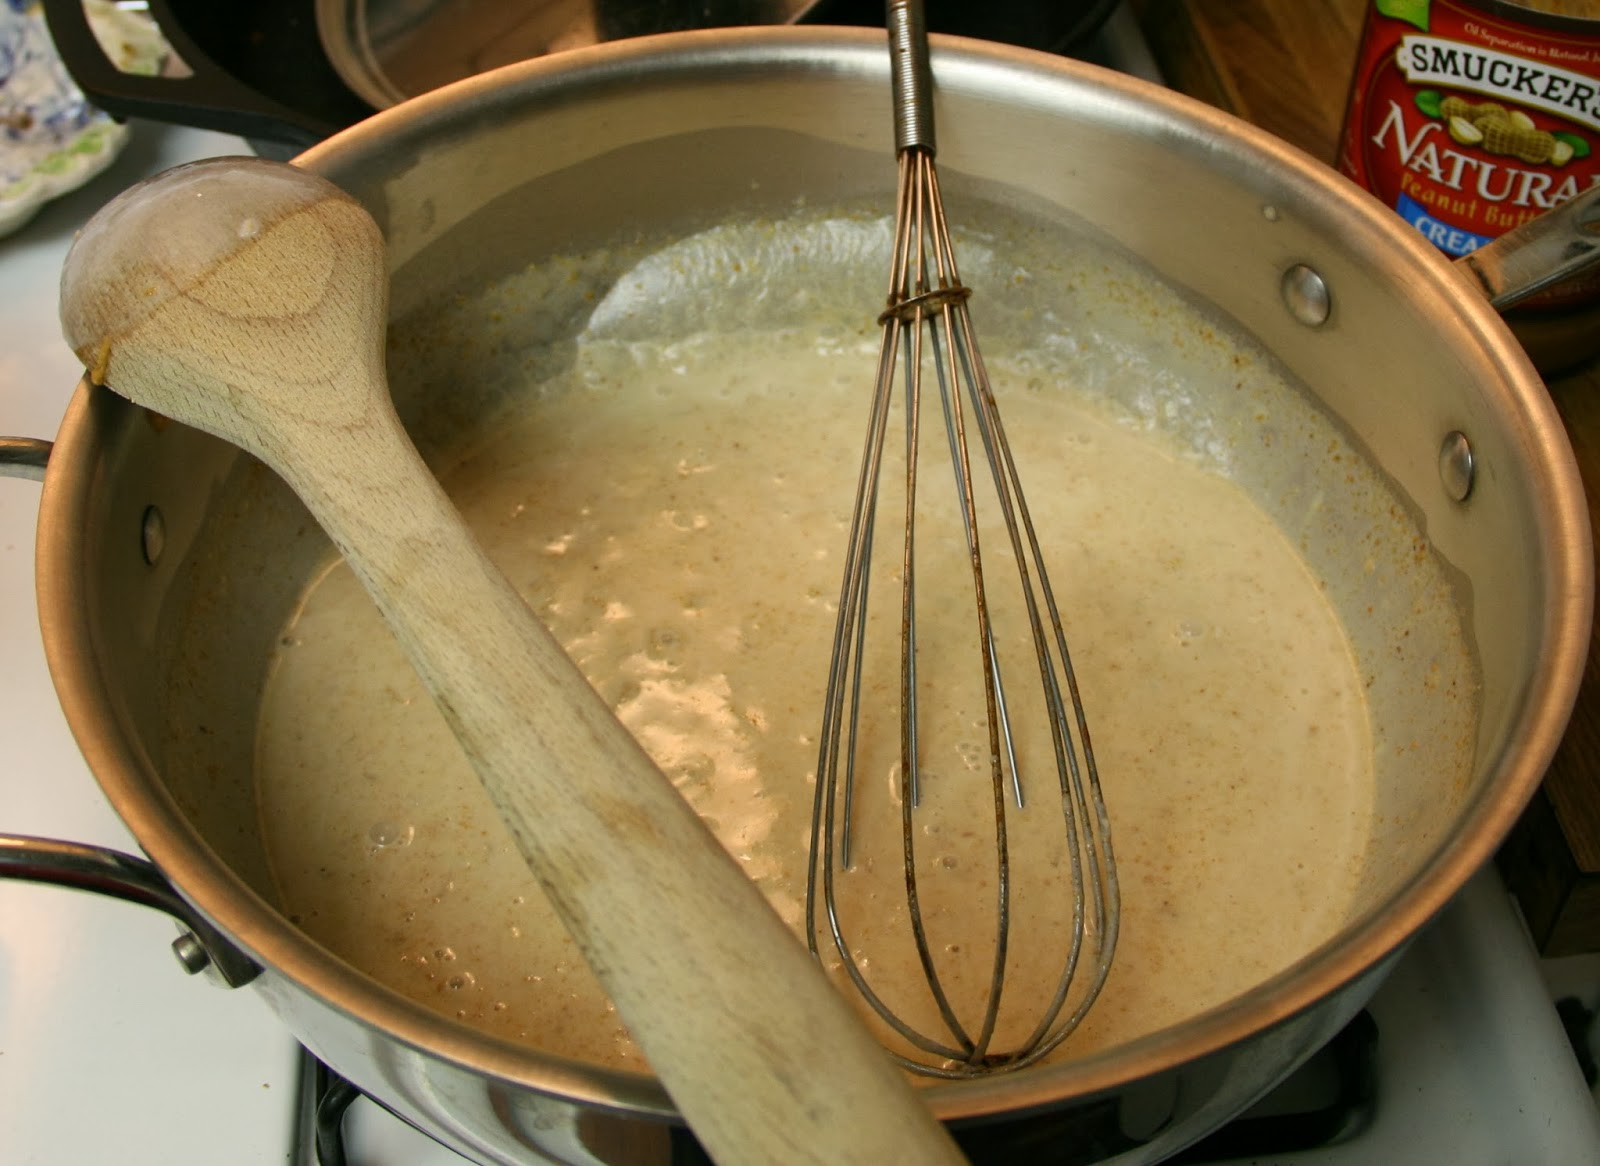
I started with peanut sauce. This is a pretty simple recipe that can easily be adjusted to suit different tastebuds. I have been making it for years and now just mix it up off the top of my head. It has a coconut milk base and is best made with natural peanut butter.
Once the peanut sauce came together I stir-fried the veggies over high heat in a cast iron wok using coconut oil which works great for high heat and has a pretty neutral flavor that lends itself well to asian cooking. When stir-frying start with the harder vegetables that take longer to cook, like carrots, and end with the lighter ones like greens. This will help everything cook evenly. At this point hopefully someone you live with will come home and you can send them out to the grill with the marinated eggplant (3-4 minutes per side) while you boil the rice noodles according to package directions and toss them with the reserved peanut sauce.
I served this on our beloved plates made by
Elizabeth Robinson. Trust me this will taste best served on something handmade. Enjoy!
Grilled Eggplant with Asian Stir-Fry and Peanut Rice Noodles
Ingredients:
Variety of vegetables not limited to:
2 carrots, 1 bell pepper, 1 yellow squash, and two bunches greens like bok choy and mizuna, and several garlic cloves
1 large eggplant
Tamari (soy sauce), toasted sesame oil, and water
1 can coconut milk
1/4 cup natural peanut butter
1 T each minced garlic, onion, and grated ginger
1 T tamari (soy sauce)
1 T toasted sesame oil
1 T honey or maple syrup
1 tsp turmeric
1 dash cayenne
1 lb rice noodles or other long thin noodle of your choice
Optional: chopped cilantro and sesame seeds to garnish
Make Peanut Sauce: Bring 1/4 can of coconut to boil over high heat, add garlic, ginger, and onion. Saute for a minute or so. Add rest of coconut milk and peanut butter, reduce heat to simmer. Whisk until peanut butter is mixed with the coconut milk. Add remaining ingredients and simmer for about 5 minutes. Adjust seasonings to taste and remove from heat.
Prepare Eggplant: Sweat eggplant according to directions above. Mix equal parts tamari, toasted sesame oil, and water to make 1/4 cup marinade. Pour over eggplant and let sit for 15 minutes minimum and up to one hour. Grill or pan-fry 3-4 minutes per side.
Stir Fry: Chop vegetables into bite size small thin pieces that will cook quickly. I like to julienne and dice for this. Mince as much garlic as you like. Heat a wok to high heat and add 1 tablespoon high temperature oil such as coconut. Let garlic sizzle and then start to add vegetables in order of cooking times. (longest first) Add salt or soy sauce as desired.
Cook noodles according to package directions and toss with peanut sauce. If sauce is to thick thin with some extra coconut milk or water. Garnish if desired with sesame seeds and cilantro. Serve with extra soy sauce and chili sauce, so taste can be adjusted to the each individual's liking.